DIY Disclaimer
All content provided on this blog is for informational purposes only. The owner of this blog makes no representations as to the accuracy or completeness of any information on this site or found by following any link on this site. The owner will not be liable for any errors or omissions in this information nor for the availability of this information. The owner will not be liable for any losses, injuries, or damages from the display or use of this information.
Why should I build an open field maze myself?
The open field maze is one of the most used setups in behavioral research, from animal personality related research to modern behavioral neuroscience. Application of the setup is quite simple (though it has some pitfalls), which likely contributed to its popularity. However, high quality open field mazes are expensive, so we started building them ourselves at my lab. To this day, we have built five such setups, from a small, circular one (Ø = 80 cm; Video 1), for cognitive testing in an acoustic discrimination task, to a large, rectangular one (2x2 m), for laboratory studies on medium scale navigation. All our setups have in common that they have an infrared illuminated floor (peak frequency at 940 nm), which:
- provides optimal contrast between animal and background for highly reliable, automated positional tracking
- allows experimentation in complete darkness (i.e. in the absence of visible light)
- allows experimentation with animals with different fur colors.
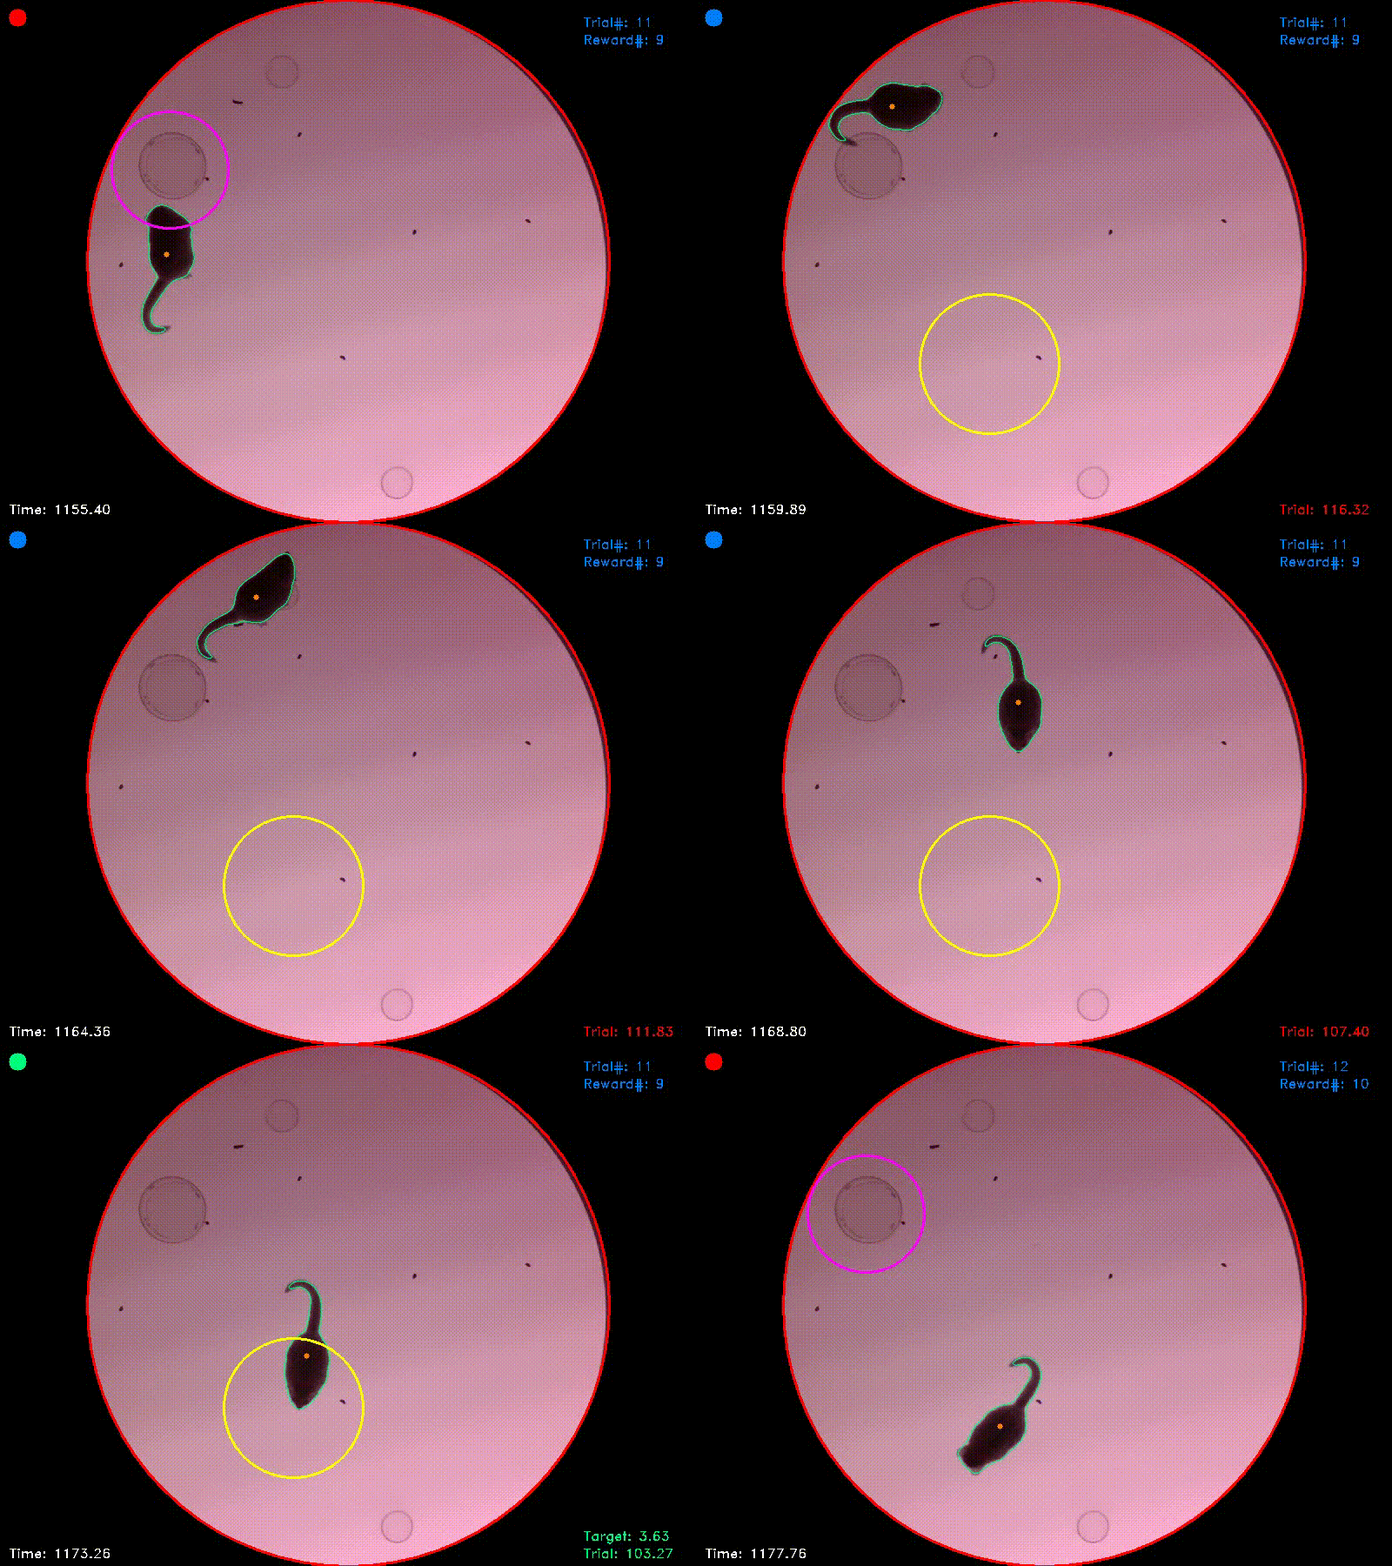
Video 1. This is one of our DIY open field mazes “in action”. I used it for experiments on acoustic discrimination learning in mouse lemurs, which required highly reliable positional tracking in real time. For details on the experiments have a look at our recently published methods paper or at this post. The slightly outdated version of our tracking software used for the mouse lemur experiments described in the paper can currently be downloaded here. A more recent version of the Jupyter Notebooks with some additional features can be downloaded here.
As a DIY project, a small open field maze with this functionality can be built for 200-300 Euros/US-Dollars, while the biggest one we have built so far cost us 1000 Euros. This is, however, still a bargain compared to the costs of commercial versions and building an open field maze yourself has the decisive advantage that you can build it exactly the way you need it.
Which materials do I need?
- floor base (e.g. compressed wood)
- infrared LED strips (940 nm)
- cables and a power source for connecting and powering the LED strips
- spacers for the actual maze floor (e.g. wooden boards)
- clear, frosted floor plate (Plexiglas® LED)
- maze walls (e.g. PVC board and PVC corners)
- screws and metal brackets
- food grade silicone sealant
- bubble level and pencil
- tools (screw driver, drill, etc.)
Preparation and planing
Before you start, make sure that all materials are available in your country and that they can be delivered in the required dimensions. Also make sure that the room in which you intend to build the setup is large enough for the construction. This may sound trivial, but when we build our 2x2 m setup into a 4x2.5 m room, we almost failed halfway through. Constructing the setup is much easier if you can access it from all sides during the process.
Laying the floor base
Directly before starting with the construction, you should vacuum and clean the floor of your experimental room. This may be the last time you will get this chance in a long time. Once clean, you can lay the floor base for your setup. We usually use thin (1-2 cm) compressed wood, as it is comparably cheap and you can use screws or a staple gun to fix stuff to it (Fig. 1). Once the floor is laid, check it for level accuracy. If the floor is uneven, use shims to level it.
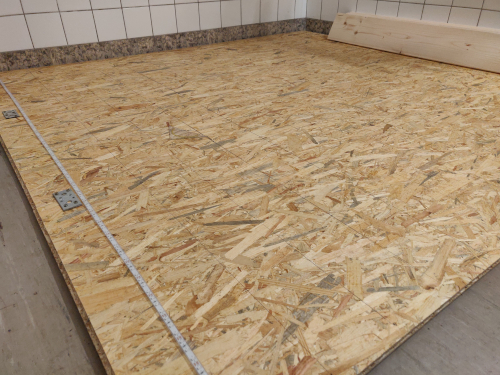
Figure 1. This is the base we used for our large (2x2 m) open field maze.
Attaching the LEDs
The next step after leveling the floor that provides the base for your setup is attaching the infrared diodes that later illuminate the floor of the open field maze. We usually use 940 nm LED strips for the illumination to make sure that our experimental animals cannot see the light. For a uniform illumination, the spacing between individual LED strips and between the LED strips and the floor plate of the open field is important. As an LED has a certain beam angle, spacing should be chosen in a way that angles of adjacent strips slightly overlap at the height of the floor of the open field. Without this slight overlap, you will later see the individual strips as bright stripes, which will interfere with animal tracking. When we built our first setup, we calculated the exact spacing for the LED strips we used and ended up with a spacing of 13.5 cm between individual strips and a spacing of 17 cm between the strips and the floor of the open field maze. Values we used for later setups were in a comparable range.
Once you decided for a spacing, draw the exact position for each strip on the floor (Fig. 1) and attach the LED accordingly using glue or a staple gun (if you choose the latter, take care not to damage the strips). For most effective cabling, make sure to alter the direction from strip to strip (Fig. 2).
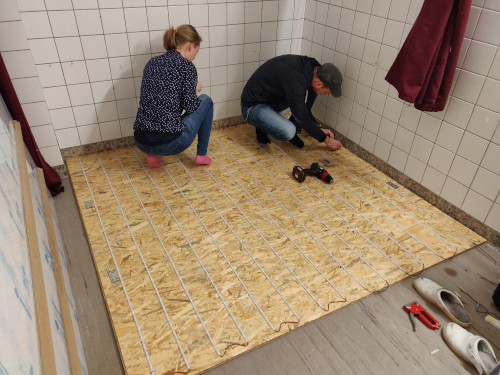
Figure 2. One of my students and I are fixing the LED strips to the floor base and checking the cables for loose contacts.
Before proceeding to the next step, power up the illumination and check the strips for defective LEDs to replace them now, if necessary. Remember that you will need a camera without infrared filter to check if the LEDs are working (Fig. 3). Any camera with a “night vision” mode should do the trick. The power source you need for the lighting will depend on the size of your maze and the number of LEDs you use. For our large setup (with approximately 30 m of LED strips) we used a 12 V power source with 10 A and 120 W.
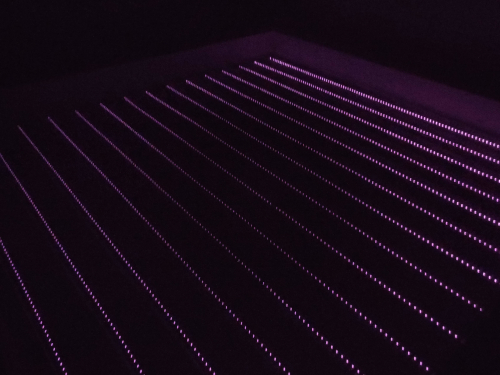
Figure 3. Switching off the room light and using an IR-sensitive camera helps finding defective LEDs.
Setting up the maze floor
To guarantee equidistant spacing between the LEDs and the maze floor, we usually built a frame from wood boards on which the maze floor could be placed (Fig. 4). If you decide for this solution, make sure to leave one or several small notches for the cables connecting the LEDs with each other and with the power source. Once the frame is positioned, you can fix it to the compressed wood using metal brackets. Afterwards, put the maze floor on the frame.
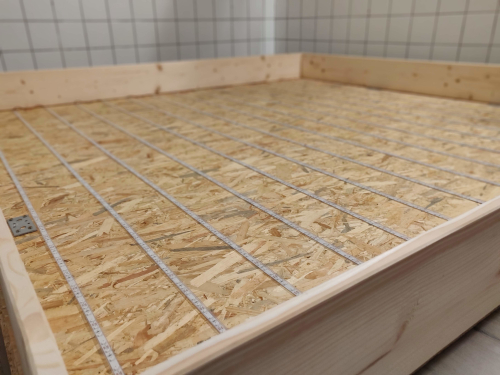
Figure 4. Wooden frame we used as a spacer between LEDs and the floor plate of our large open field maze.
As material for the maze floor, we used a special brand of acrylic glass called “Plexiglas® LED” (Röhm, Darmstadt, Germany). This material is designed to optimize backlighting with LEDs by maximizing transmittance of the light, which prevents lighting hotspots. As mentioned before, the absence of such hotspots is vital for the quality of the computerized tracking. Unfortunately, besides the LED strips, the floor board is the most expensive part of the setup. In Germany, one m² (clear, frosted, 3 mm thick) currently costs 113 Euros (approx. 130 US-Dollars) and shipping can be quite expensive, too, if you order a large board. I am not sure, if there are similar (maybe cheaper) materials from other manufacturers or whether Röhm has patented the material. If you know any alternatives, send me a message and I will happily add them as options.
When positioning the floor plate, you have to be aware that the material is quite thin (3 mm) but heavy (approx. 3600 g/m²). Therefore, large boards will inevitably sag at their center, if not supported. For our large open field maze, we had to support the 2x2 m board from below using 10 clear and fully translucent acrylic glass cylinders. For some of our smaller open field mazes, we reduced the number of supporting cylinders necessary by providing larger supportive surfaces at the edges of the floor plate (for an example see Fig. 5).
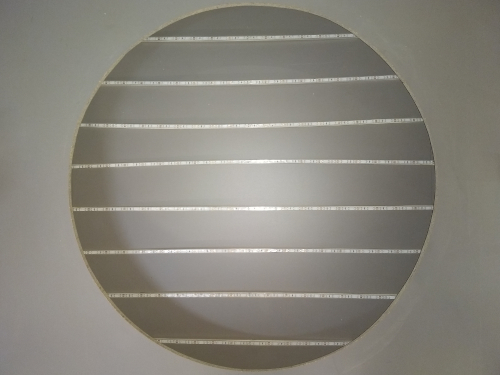
Figure 5. For our small, circular open field maze, we used a large supportive surface for the maze floor to prevent sagging of the floor. The area of the actual arena is mainly unsupported.
As soon as you are happy with the positioning of the maze floor, you can again use metal brackets to fix it to the frame or supportive surface. If you decide to drill holes through the Plexiglas to fix the floor plate using screws, you should be especially careful, as the material can easily crack. For each hole, start with drilling a small pilot hole and then gradually increase the drill bit size until you reach the target size for the holes. For some small but heavy mazes, it may be possible to skip fixation of the maze floor (e.g. Fig. 6).
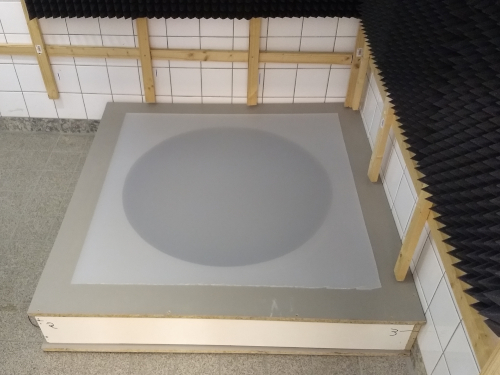
Figure 6. Due to the large supportive surface, the maze floor of this maze does not noticeably sag. We even decided not to fix the maze floor to the supportive surface, as the weight of the finished setup sufficed to keep everything in place.
Adding the side walls of the maze
The final step of constructing your maze is building the side walls. For rectangular mazes, we usually used PVC boards as material, as they are quite cheap and can be bought in most hardware stores. If necessary, cut them to the desired size. Glue them together using a strong adhesive and PVC corners as connectors (Fig. 7).
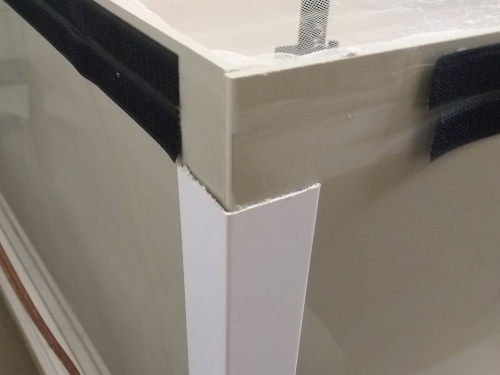
Figure 7. For this rectangular open field maze, we used PVC corners and strong adhesives to support the walls built from PVC boards and to guarantee 90° angles. We also attached hook and loop fasterner to the outside of the walls, allowing for the fastening of a mosquito net to keep artistic animals from escaping.
A circular open field can be bent from a single, large PVC board. If you are lucky (as we were), the store at which you buy the PVC boards will also do the bending and welding for you. Since doing this yourself can be quite challenging (at least if you want to end up with a perfectly circular shape), it is probably worth the surcharge. Also, you have to make sure that you have a big car for transportation and wide doors all the way from the store to your experimental room, as tubes with diameters of 80 cm or more can be surprisingly bulky (Fig. 8).
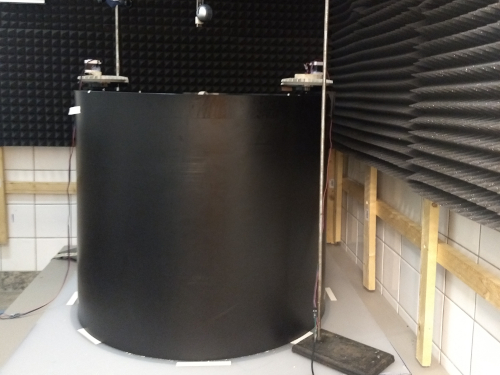
Figure 8. This is the finished circular open field maze. As you can see, the walls are quite high (70 cm) for this one. Since we used it for acoustic experiments, the walls behind the maze and the ceiling are covered with echo-reducing foam. You can also see two computer controlled food dispensers we built and the webcam used for real-time positional tracking.
If your side walls are finished and found their way to the rest of the setup, put them on the translucent floor plate. Once your happy with their positioning, fix them to the floor plate. We usually used silicone sealant for this final step, as it can easily be removed, if necessary. If you use the sealant at places that can later be reached by the experimental animals, make sure to use food grade silicone.
Install a camera and start experimenting
If you want to film your experiments or use real time animal tracking to trigger additional setup components (such as feeders) based on the animal’s position, you will have to install a camera above the setup. For a perfect bird-eye view, the camera has to be positioned exactly above the center of the maze and the lens (and chip) has to be parallel to the maze floor to avoid undesired spatial distortions. You should be aware of the simple fact that the larger your maze is, the higher the camera has to be mounted. For our large open field maze, we had to position the camera more than two meters above the maze floor to get a complete view (Video 2), so make sure that you ceiling is high enough for your maze. Also, remember to use an infrared sensitive camera. For offline tracking, we usually use board cameras, as they are small, comparably cheap, and can easily be fixed to never move again. For real-time tracking, we use webcams for the same reasons and because their video stream can easily be fed into a computer for further processing.
Once the camera is installed, you are ready to go! Have fun experimenting!
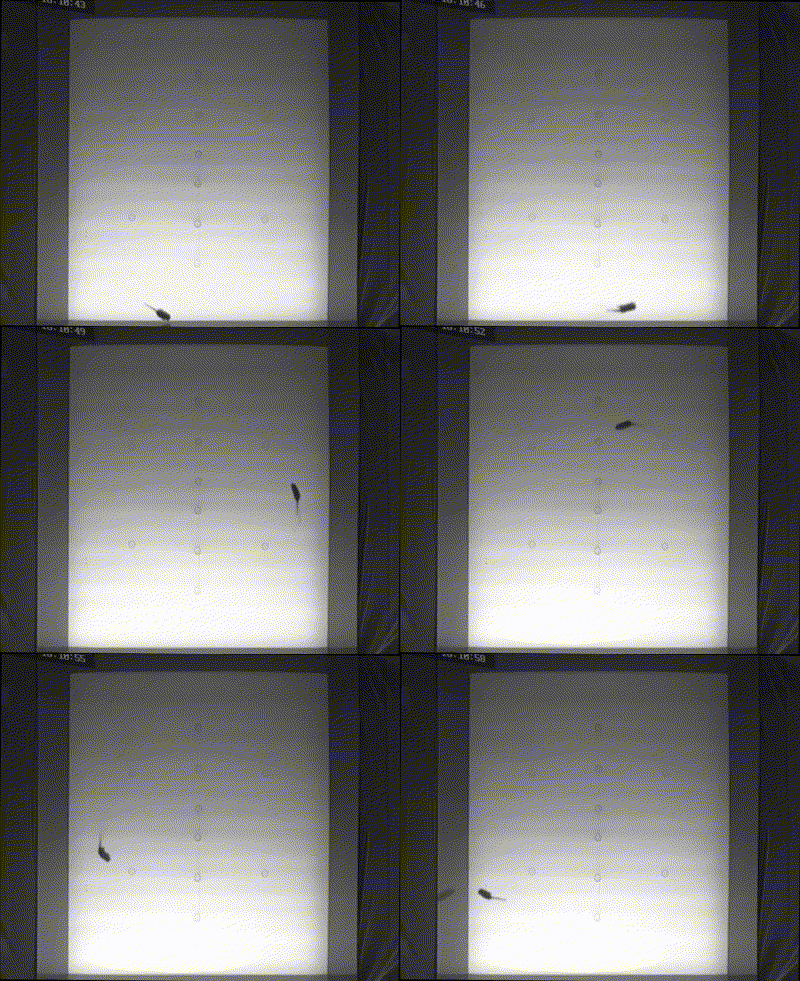
Video 2. This is our 2x2 metres DIY open field maze “in action”. The experiment was conducted in complete darkness, which means the only light within the room is the “invisible” infrared illumination from below the maze floor. In this case, the experiments were recorded and the animal’s position was tracked offline from the video footage.
Optional modifications
- hook and loop fastener for the fastening of mosquito nets (to keep hyperactive animals from escaping your maze; Fig. 7)
- one or several entrance holes (Fig. 9)
- active/passive illumination (Fig. 9)
- lids
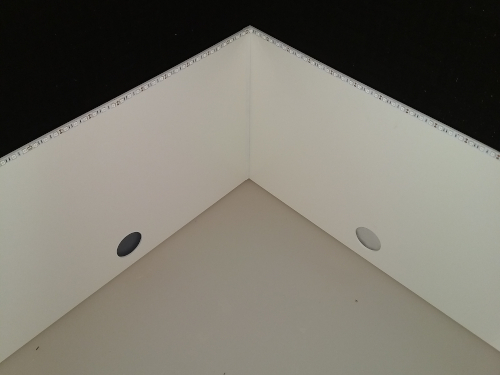
Figure 9. This is another small and rectangular open field maze we built. Different from the previous ones, it has entrance holes that exactly fit the exit holes of our transport boxes, so that our animals can enter the maze by themselves (which reduces stress). Along the top corner you can see additional LEDs, which allow for active illumination of the maze. However, normally you will want to provide the illumination passively from behind the walls of the maze. Small mazes like this can easily be “closed” from above by using translucent acrylic glass lids.